サンプル画面を確認し、本格的な開発にあたってIDEをCloud9で使用する設定をしました。
blog 生成
blogという名前のrailsアプリケーションを作りました。
rails new blog
該当のコマンドで予め用意されているblogアプリケーションがダウンロードされます。
エラー発生
ダウンロードは完了しましたが、エラーが出ました。
Gem::Ext::BuildError: ERROR: Failed to build gem native extension.
current directory: /tmp/bundler20191116-12860-iie6sqlite3-1.4.1/gems/sqlite3-1.4.1/ext/sqlite3
/usr/bin/ruby2.5 -r ./siteconf20191116-12860-3nvvhf.rb extconf.rb
checking for sqlite3.h... no
sqlite3.h is missing. Try 'brew install sqlite3',
'yum install sqlite-devel' or 'apt-get install libsqlite3-dev'
and check your shared library search path (the
location where your sqlite3 shared library is located).
*** extconf.rb failed ***
Could not create Makefile due to some reason, probably lack of necessary
libraries and/or headers.  Check the mkmf.log file for more details.  You may
need configuration options.
sqlite3 1.4.1がちゃんとインストール出来ていないようです。
gem install sqlite3 -v '1.4.1'でも同じでしたので、次のコマンドで解決できました。
sudo apt-get install libsqlite3-dev
sudo gem update
bundle install
railsを実行してみましょう。
rails server
また、エラー
エラーが出ました。
/var/lib/gems/2.5.0/gems/webpacker-4.2.0/lib/webpacker/configuration.rb:95:in `rescue in load': Webpacker configuration file not found /home/ubuntu/blog/config/webpacker.yml.
Please run rails webpacker:install Error: No such file or directory @ rb_sysopen - /home/ubuntu/blog/config/webpacker.yml (RuntimeError)
webpackerのインストールが必要そうですね。
先ずはnode.jsとyarnをインストールし、webpackerをインストールしました。
curl -sL https://deb.nodesource.com/setup_13.x | sudo -E bash -
sudo apt-get install -y nodejs
curl -sS https://dl.yarnpkg.com/debian/pubkey.gpg | sudo apt-key add -
echo "deb https://dl.yarnpkg.com/debian/ stable main" | sudo tee /etc/apt/sources.list.d/yarn.list
sudo apt-get update && sudo apt-get install yarn
rails webpacker:install
インストール完了後、railsサーバを立ち上げることができました。
接続してみましょう。
ローカル環境でしたら、127.0.0.1:3000で接続できますが、今はec2で、設定を変えました。
80ポートを使用可能にSecurity Groupの設定を変更
EC2のSecurity GroupのInboundに80ポートを追加しました。
0.0.0.0:80でサーバ起動
rails server -b 0.0.0.0 -p 80
接続
EC2のパブリックipに接続してみました。
サーバ起動中
メイン画面
やっとメイン画面が出ました。これからは本格的な開発になりそうですね。
Cloud9設定
その前に、IDEを使用するために設定しました。
SSHでアクセスすればどんなIDEも使用可能ですが、AWSのEC2で環境を構築しまして、IDEもAWSの物を使ってみます。
Cloud9は最初からすぐにEC2で環境構築が可能ですが、今回は作ったEC2を使用します。
接続するipが変わらないようにelastic ipを割り当て、上のリンクにある~/.ssh/authorized_keysを作成しました。
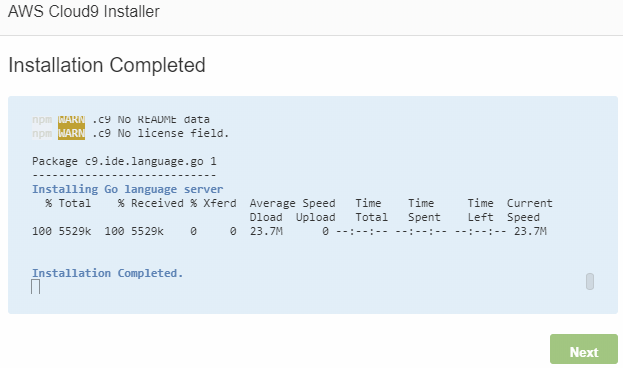
後は、AWS Cloud9 Installerが実行されました。
インストールが終わった後、Cloud9の画面の下のbashにrails server -b 0.0.0.0 -p 80を実行し、サーバが立ち上がってメイン画面も確認できました。
これからは本格的な開発になりそうです。


